Want to optimize your design process on Figma? Fyresite designers have compiled this list of our top 10 Figma Design tips. Whether you’re a Figma newbie or a seasoned pro, use these tips to make the most of your Figma designs.
Tip #1 – Know Your Hotkeys
Hot keys are great for helping you accomplish tasks quicker and more efficiently. Here are some of the most useful ones that you’ll find on Figma.
Note: For ease, these hotkeys will be using the Mac terminology. If you have a Windows computer, you must make the necessary translations (such as CMD to CTRL) for them to work.
Hotkeys for Layers
To quickly access the bottom layer, use Command + Click. To get to the parent layer, use Shift + Enter. To collapse all layers, use Option + L. To mass rename all of your selected layers, use CMD + R.
Hotkeys for Styling
To copy a style, use Option + Command + C. To paste it, use Option + Command + V. To resize an element/image, click what you want to resize and press K. If you want to increase your font size, use Command + Shift + >. To decrease, use Command + Shift + <.
To tidy up, use Command + Option + Shift + T. To view the hierarchy menu, use Command + Right Click on option.
Tip #2 – Use Frames
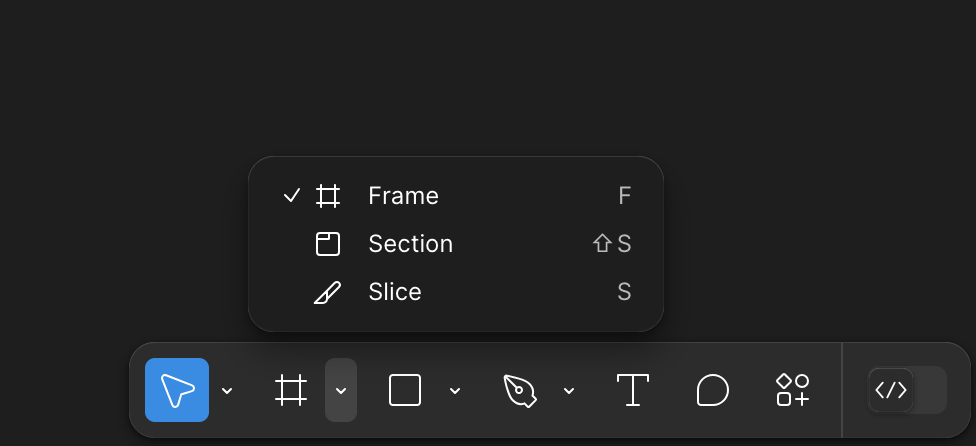
Frames are an incredibly helpful way to set dimensions.
Frames show you both dimensions, and, more importantly, gives you the dimensions of specific screens, including phone, tablet, and computer. It is especially useful to design within these frames because it gives you (or your client) an idea of what the design will look like from a user standpoint.
Tip #3 – Use Auto Layout in a Component to Stay Organized
If you have multiple variants under one component, but are still trying to stay organized, this tip is for you.
By selecting Auto Layout in the component you’re designing, you can easily adjust the spacing between each variant and guarantee that the spacing is equal among each variant. In other words, it allows the creation of a quick, uniformed list.
Tip #4 – Size Before Design
When it comes to design, one size doesn’t fit all. Before you begin design, make sure you’re sized for what you’re designing.
When you go to select a frame for your design, you can choose from many different sizes, including screen sizes for varying mobile devices.
If you’re designing for both mobile and desktop, it is recommended that you start with mobile, since that is the more limited design. It’s easier to build on your design than to take it away.
Tip #5 – Determine Font Sizing Before Designing
If you determine what size you want your fonts (such as heading, subheading, text, etc) before you start designing, you can save yourself a lot of hassle.
You can either decide on your font and sizing, writing down a reminder for where it is, or you can use a plug-in. Either way, keeping a consistent font will help your design look neater and streamline your designing process.
Tip #6 – Don’t be Afraid to Try Different Tools
It can be tempting to use only the tools that you’re confident with, and ignore all the others.
Figma has a large suite of tools, all with different uses. Outside of the ones that come in the Figma toolbar, you can also search through the hundreds of free and paid tools available through the Figma community.
\
Tip #7 – Use ‘View Only’ Mode to Move Files
Figma files have a limited memory storage. When your design is full, but you need to copy layers from a page to continue the design, you’ll use this tip.
Open the relevant file in ‘view only’ mode. Then, copy the layers from the pages you need to a new file. That’s it! Now you can continue or recover the needed design.
Tip #8 – Use Your Address Bar to Quickly Create a New Figma File
To quickly go to a new Figma design from the web app, you only need your address bar. Just type Figma.new to be brought to a new design file. Quick note: this will only work from a browser.
Tip #9 – Set Your Nudge Amount
On Figma, you can ‘nudge’ your design by a specified number of pixels. By default, the nudge amount is 10 pixels. However, it is recommended for a novice and expert alike to change this nudge to 8 pixels.
Using a nudge of 8 px is recommended because most screen sizes are divisible by 8. Thus, designing with a nudge of 8 px makes scaling for different devices much easier.
Tip #10 – Click the Question Mark for Help and Insight
When you’re in a Figma file, you might notice a helpful little question mark in the bottom right corner. Here, you can access more than the average help FAQs.
It will open a menu that allows you to access the help center, the support forum, YouTube videos from the official Figma channel, release notes to keep you informed on the newest updates, and Figma’s Legal updates.
Here, you can also submit feedback, ask a question in the Figma community, and contact Figma support.
 Taylor Simmons

